Have you ever wondered how Kubernetes works inside? How much magic and unicorns are hidden there? Let's try to build small, not production-ready cluster from scratch, so that we can learn about Kubernetes internals.
This article is based on famous Kubernetes The Hard Way repo created by amazing Kelsey Hightower. This article aims to explain how Kubernetes works inside and not how to prepare production ready cluster.
What do you need before creating Kubertenes cluster from scratch?
First of all, we need to create DigitalOcean account, then install and set up the CLI.If you're familiar with any other cloud provider, feel free to use it instead. This is our first step in creating kubernetes from scratch.
Cloud
What is Kubelet in creating Kubernetes cluster?
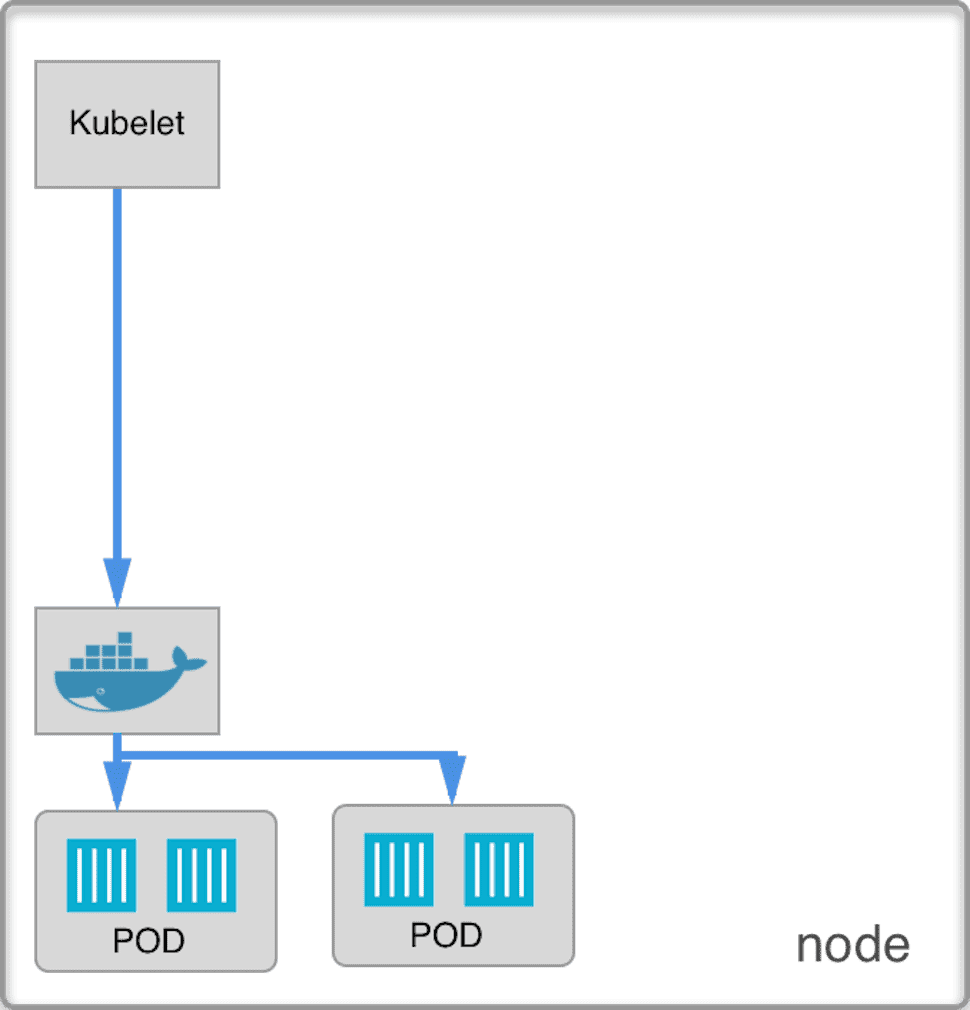
This is the first and most important component in Kubernetes. Kubelet’s responsibility is to spawn/kill pods and containers on its node, it communicates directly with Docker daemon so we need to install it first.
So let’s download Kubernetes binaries and run kubelet.
We run Kubelet with --config argument.
Now we can check docker ps to see that our container has been added and try to curl it:
This is how our node looks like now:
Kube API server
Kubernetes use etcd, a distributed database with strong consistency data model to store the state of whole cluster. API Server is the only component that can talk to etcd directly, all other components (including kubelet) have to communicate through API Server. Let’s try to run API Server with kubelet.
First we need etcd:
And the API Server:
WARNING: Do not try it on production, setting --insecure-bind-address to 0.0.0.0 allows external clients to access the API server omitting authentication and authorization.
Now we can connect kubelet to API Server and check if it was discovered by the cluster.
First of all, we need to create kubeconfig file. Kubeconfigs are configuration files managing access to the cluster. They store such information as API server address, user credentials etc.
Notice here that the pod hangs in Pending status – but why? This is because we don’t yet have another Kubernetes component responsible for choosing a node for the pod – Scheduler. We will talk about it later but for now we can just create nginx2 with updated manifest that determines what node should be used.
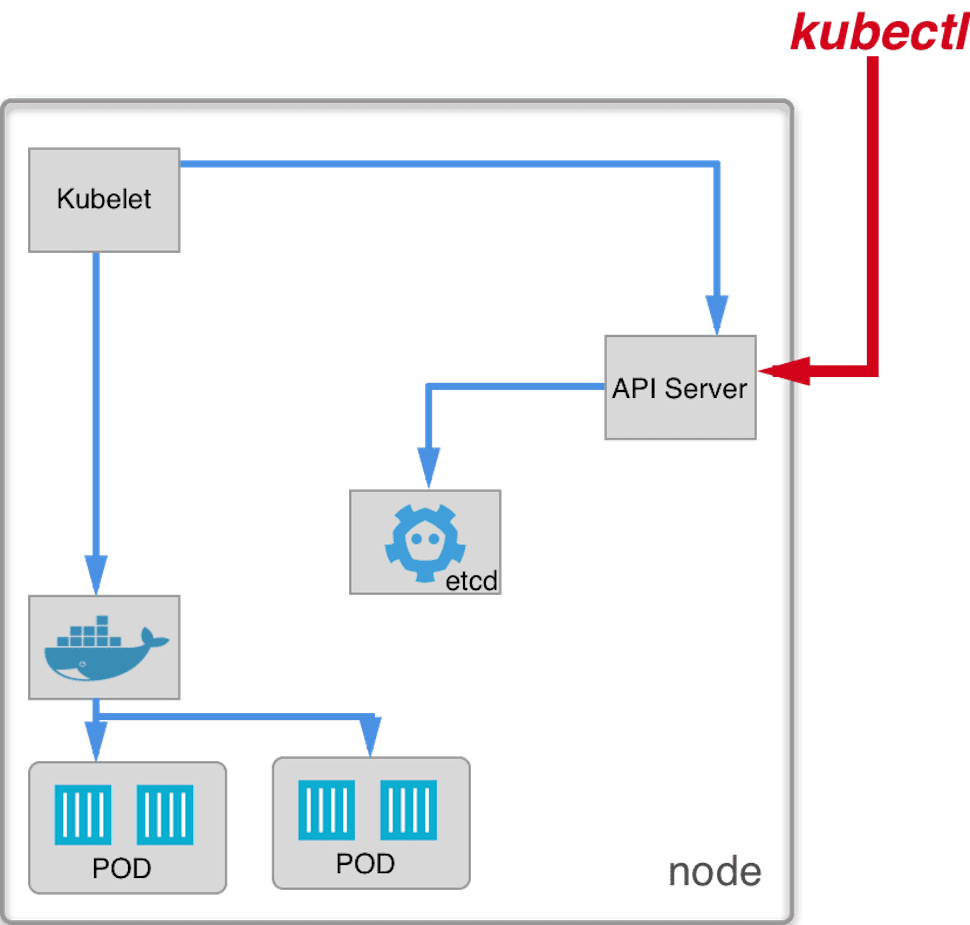
Great, so now we can see that API Server and kubelet works. This is how our node looks like now:
What is Kube scheduler in creating Kubernetes?
Scheduler is responsible for assigning pod to a node. It watches pods and assigns available nodes to those without one.
We still have nginx pod that is in Pending state from previous example. Let’s run scheduler and see what happens.Note that we could also create kubeconfig file (and on production we should), as we did with kubelet. Instead,we will only pass --master option to specify API server address. As we don't have controller manager running yet, we will also have to manually remove not-ready taint from our node, which does not allow scheduler to run pods on that node.
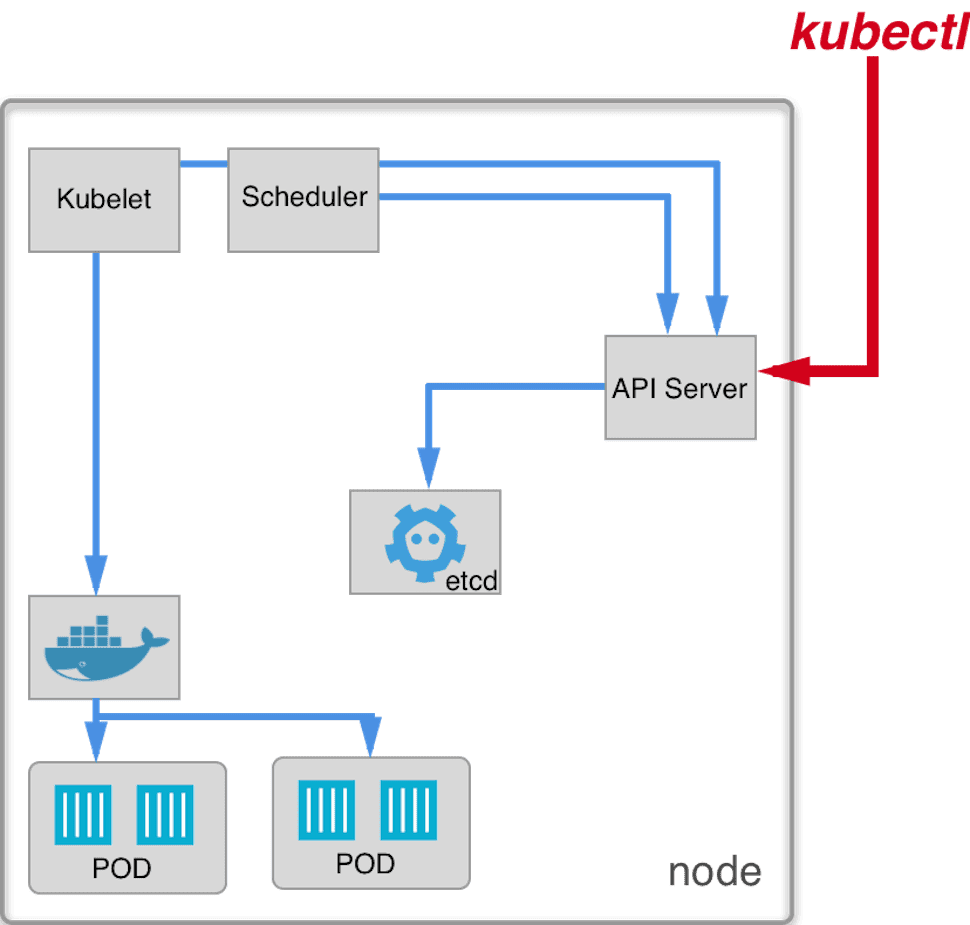
As you can see the scheduler kicks in, finds a pod and assigns it to the node.You can see its placement on our node schema:
Kube Controller Manager and it's role in Kubernetes deployment
Controller Manager is responsible for managing (among others) Replication Controllers and Replica Sets so without it we can’t use Kubernetes Deployments.
Here we are going to run it and create a deployment.
Then create the deployment and check what has happened:
As you can see, we have the deployment, but its pod has not been created. This is where we need kube-controller-manager. As mentioned before, one of its main tasks is to watch on changes made to the kubernetes cluster and keep it in the desired state. Let's create it in the next step:
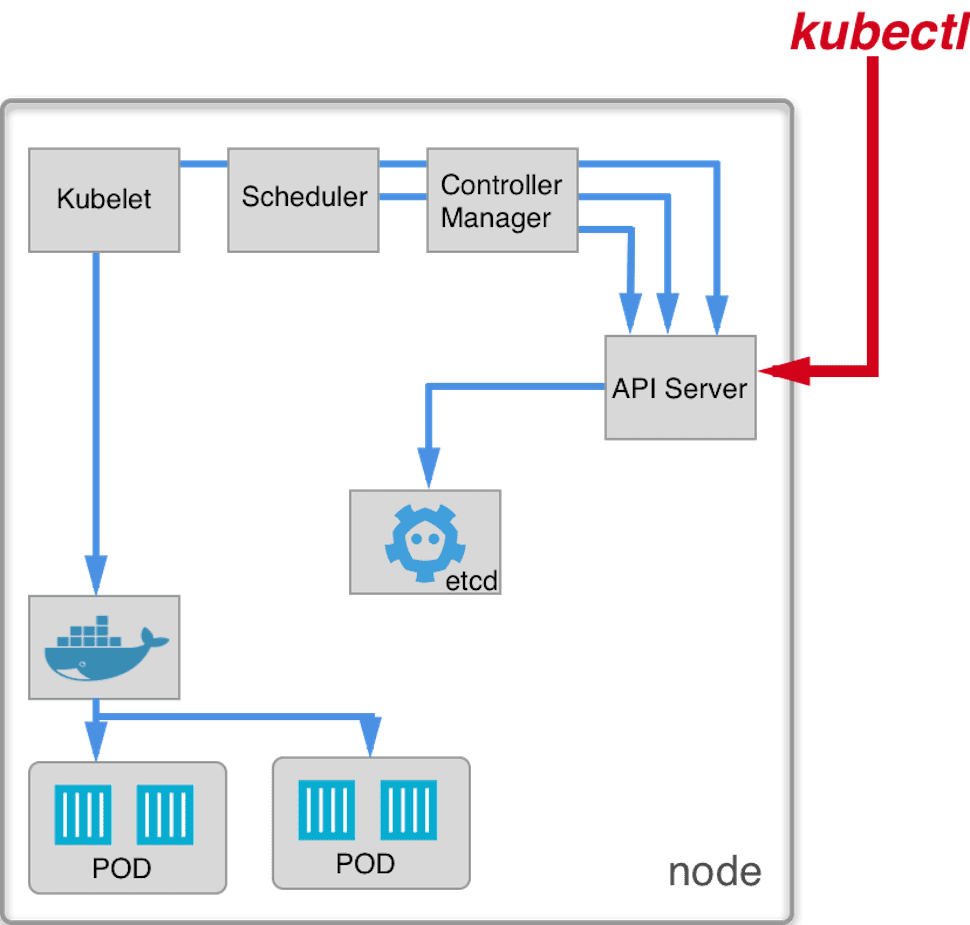
Updated version of our node scheme:
Scaling the deployment
One of main features of deployments is the ability to scale. We can in any moment set the number of pods in the deployment. Let's see the example:
Kubernetes deployment automatically created 2 additional pods for us.
What is Kubernetes proxy?
Kubernetes (network) proxy is responsible for managing Kubernetes Services and thus internal load balancing and exposing pods internally for other pods and for external clients.
Nginx deployment is now exposed via 30073 port externally, we can check that with curl.
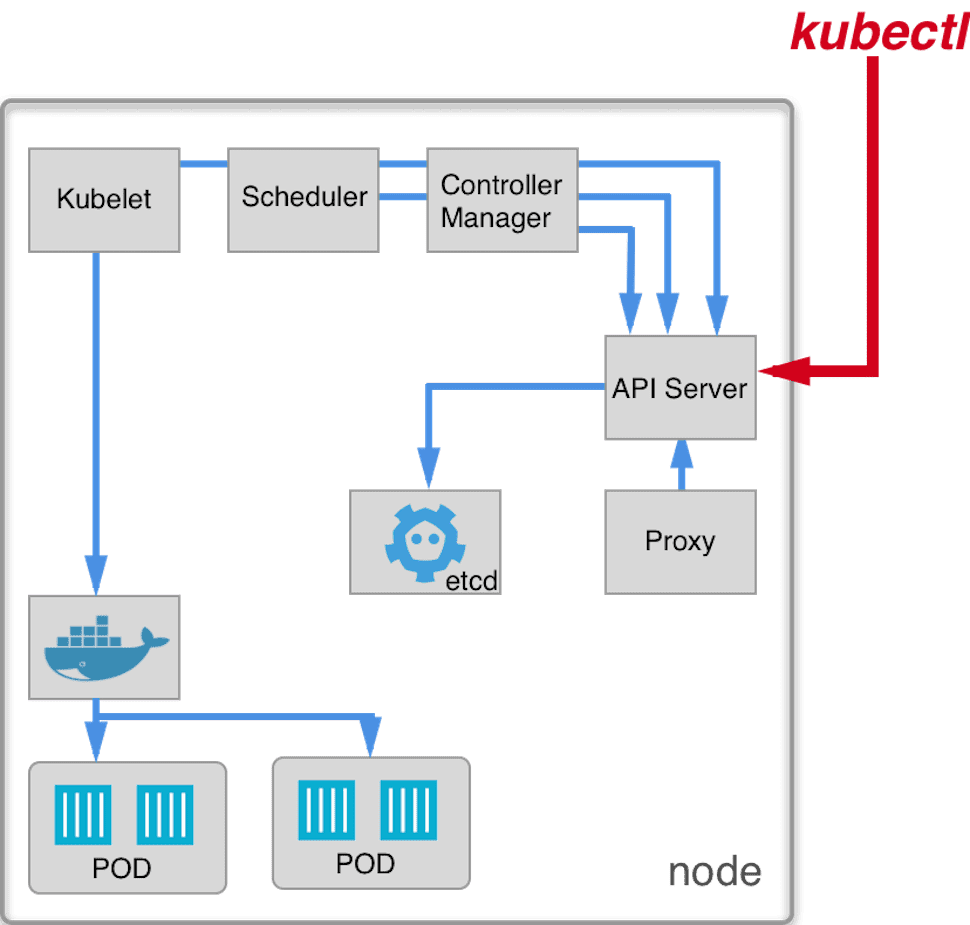
Our updated node schema:
Wrapping up on Kubernetes from scratch
That way we have gone through the steps of developing kubernetes from scratch. Finally, we have something that we can’t really call a cluster yet but we have learned how Kubernetes components works together. What is really astonishing is how well designed and decoupled Kubernetes parts are. After understanding each part’s role in the system Kubernetes should no longer be a mystery for us.
In the next blog post I will describe how to add more nodes to our kubernetes cluster and load balance ingress between them, so stay tuned!